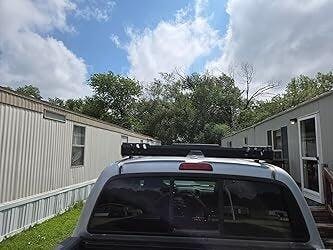
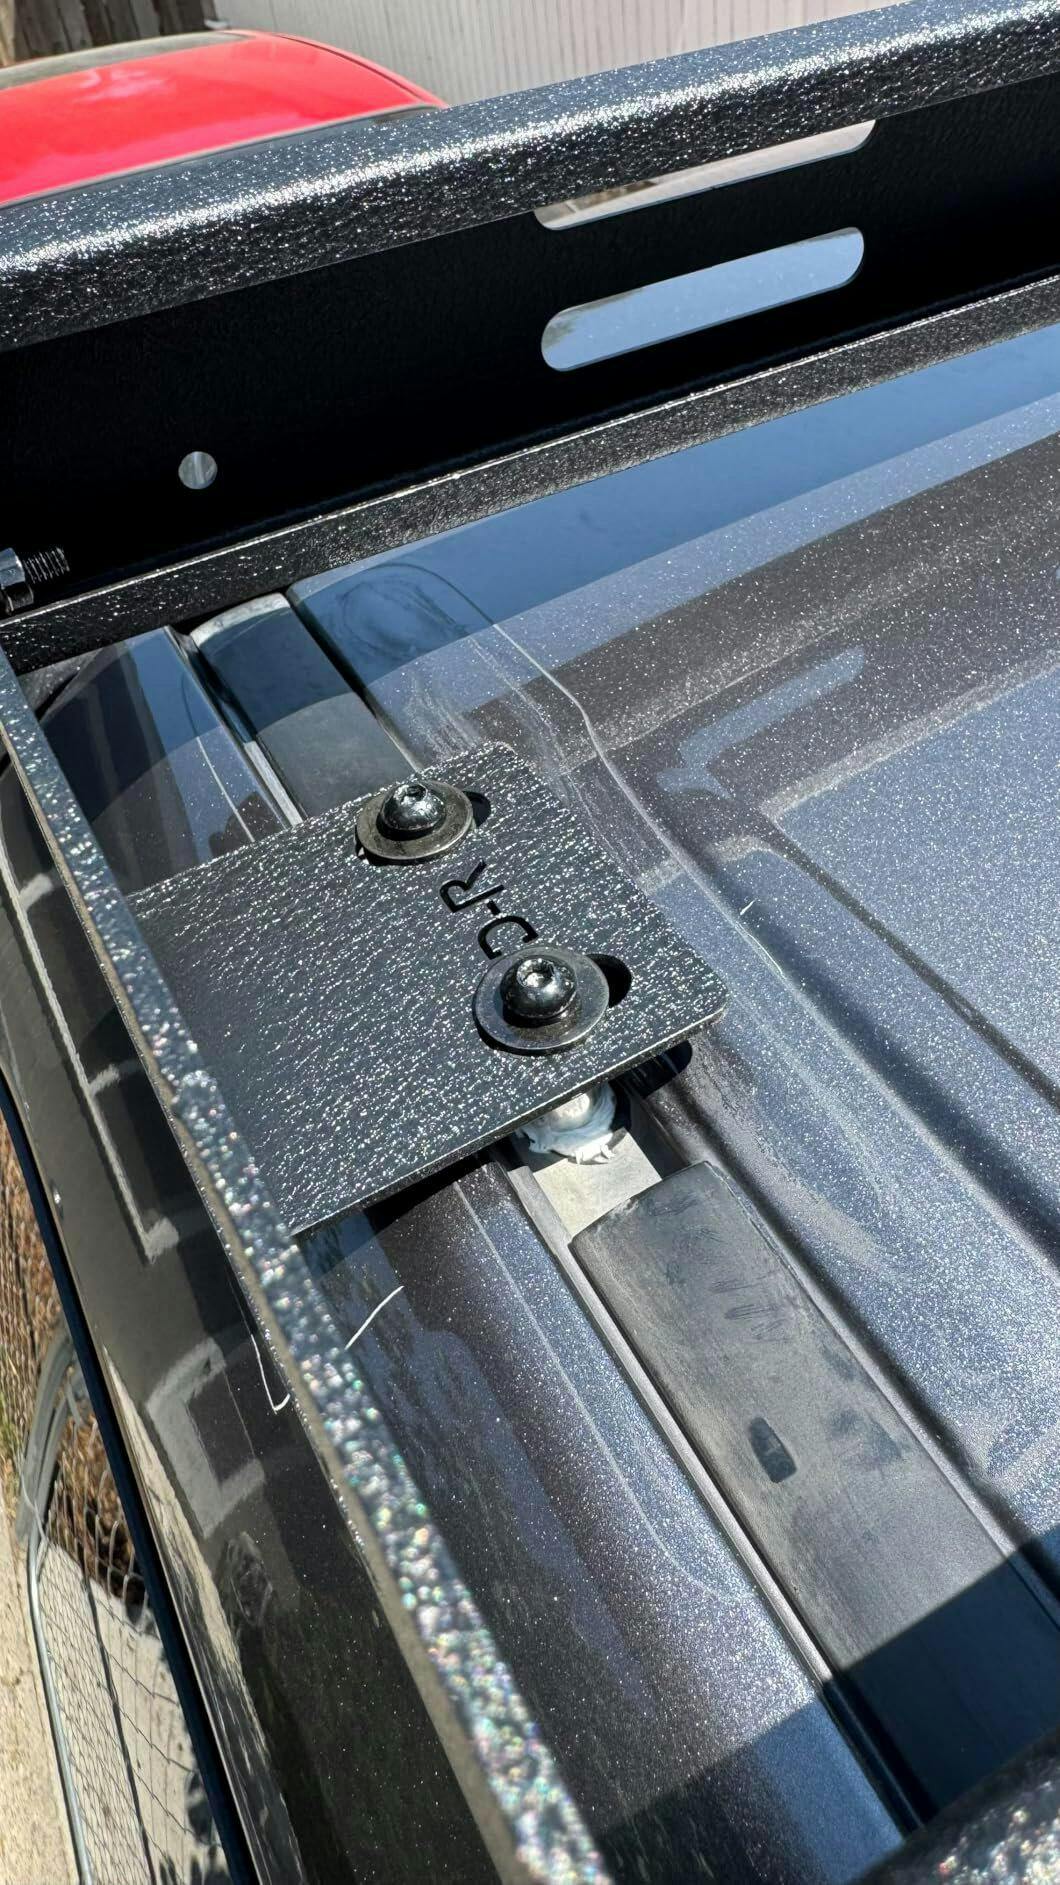
- Ajuste de precisión según especificaciones OEM:Diseñado específicamente para el GWM Cannon (2021-2026), utilizando los puntos de fijación originales sin necesidad de modificar el vehículo.
- Instalación sin taladrar:El auténtico diseño de montaje directo no requiere taladrar ni cortar, lo que preserva la integridad estructural y el valor de reventa de tu vehículo.
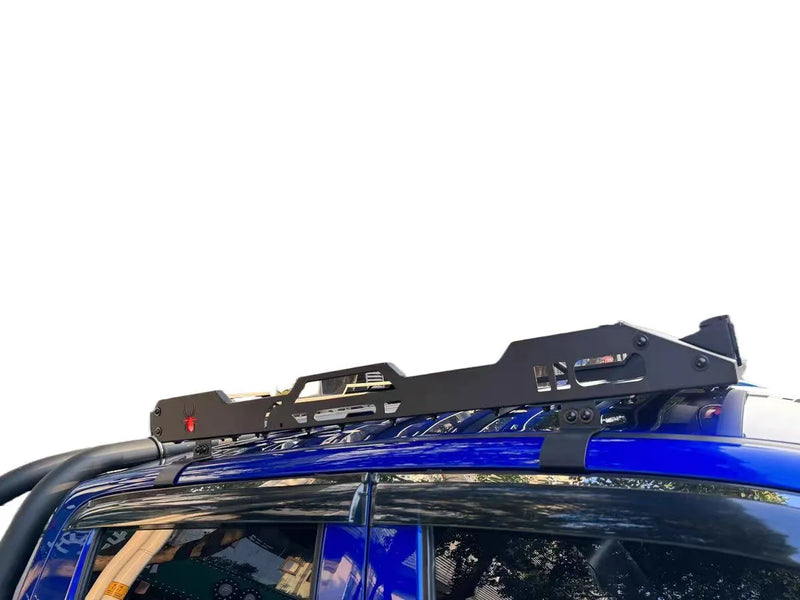
- Aluminio de calidad aeronáutica:La estructura de aluminio extruido de alta calidad ofrece una relación resistencia-peso superior, al tiempo que minimiza el impacto en el consumo de combustible.
- Aerodinámica silenciosa:Su diseño discreto y aerodinámico en forma de ala reduce la resistencia al viento y elimina los molestos silbidos.
- Integración universal con ranuras en T:Ranuras en T estándar totalmente compatibles con rieles de recuperación, toldos, tiendas de techo y portabicicletas.
- Resiliencia ante fenómenos meteorológicos extremos:El recubrimiento en polvo negro mate, resistente a los rayos UV, soporta la intensa exposición al sol y la sal marina sin descolorarse ni oxidarse.
- Alta capacidad de carga:Soporta hasta 100 kg de carga dinámica (en marcha) y 300 kg de carga estática (en estacionamiento), lo que lo hace ideal para los aficionados a las tiendas de techo.


Portaequipajes Gwm Cannon
Precio regular
$499.00
Precio de venta
$499.00
Precio regular
Precio unitario
Ahorre
Quick Answer
60-second summary
Baca portaequipajes de aluminio de grado aeronáutico para GWM Cannon (2021-2026) con capacidad de carga estática de 300 kg y ajuste de fábrica. Instalación atornillada sin perforaciones que utiliza los puntos de montaje existentes; incluye integración de ranura en T para tablas de desatasco, toldos, tiendas de techo y portabicicletas.
Install time
45-60 minutos
Drilling
No - atornillado
Warranty
Sí, no invasivo
Guaranteed Fit — Zero Purchase Risk
Verified for your vehicle. If these parts don't fit, we cover return shipping and issue a full refund. No questions asked.
Confirm this fits your vehicle
Volume Discount — More Sets, More Savings
1 Set
Standard price
$499.00
2 Sets
Save 10% — $449.10 each
$898.20
$998.00
3 Sets
Save 15% — $424.15 each ★ Best value
$1,272.45
$1,497.00
-
Entrega estimada:Aug 03 - Aug 07
-
¡Envío aéreo exprés gratuito en pedidos superiores a $100!

Portaequipajes Gwm Cannon
Ajuste de Precisión Garantizado
Cada pieza verificada con datos OEM del vehículo. Garantizado que encajará en tu vehículo — o cubrimos el envío de devolución y reembolsamos el importe íntegro.
Diseñado para Plataformas EV
Piezas diseñadas para BYD, Tesla, MG, GWM y KIA — calidad de especificación OEM, probadas para sistemas eléctricos EV y compatibilidad de pinzas de freno.
Tus Piezas, Tus Condiciones
Pagos divididos con Zip, Afterpay o Shop Pay. Opciones sin intereses — aprobado en segundos en el checkout, sin formularios requeridos.
Características y Beneficios
Lo que Incluye
Galería del Producto
Vehículos compatibles confirmados para esta pieza. Usa el selector de vehículo arriba para verificar la compatibilidad de tu auto específico.
| Rango de Año | Marca | Modelo |
|---|---|---|
| 2021-2026 | GWM | Cannon |
⚠ Nota de compatibilidad
Para compatibilidad con modelos, años o variantes específicos, envíe su número de bastidor (VIN) o los detalles de su vehículo a support@evparts4x4.com; le confirmaremos la compatibilidad en un plazo de 24 horas.
¿No estás seguro de la compatibilidad? Contáctanos — confirmaremos en 24 horas.
Tiempo total
45-60 minutos
Requiere taladrar
No - atornillado
Garantía
Sí, no invasivo
Sí, este portaequipajes está diseñado a medida para los modelos GWM Cannon de 2021 a 2026. Utiliza los puntos de montaje de fábrica sin necesidad de modificar el vehículo, lo que facilita la instalación y preserva la integridad estructural de su vehículo.
El Starlight A mide 125×107 cm y es la opción más compacta, mientras que el Starlight C es más grande, con 140×100 cm, lo que le brinda más espacio en el techo para carga o una tienda de techo. Ambas variantes vienen con luces LED integradas y son compatibles con el mismo sistema de montaje. Elija según sus requisitos de carga y el espacio disponible en el techo.
No, esta es una instalación que no requiere perforaciones. El portaequipajes utiliza los puntos de montaje de fábrica de su GWM Cannon con un diseño atornillado que no requiere perforaciones ni cortes. Simplemente retirará las tapas protectoras para exponer los orificios roscados de fábrica y asegurará los soportes con los tornillos M8 provistos.
El portaequipajes soporta hasta 100 kg de carga dinámica mientras conduce y 300 kg de carga estática cuando está estacionado. Esto lo hace ideal para entusiastas de las tiendas de techo y situaciones de carga pesada. La construcción de aluminio de grado aeronáutico ofrece una resistencia superior sin afectar significativamente la eficiencia del combustible.
La instalación suele tardar de 1 a 2 horas para la mayoría de los usuarios que lo hacen por sí mismos. El proceso implica localizar los puntos de montaje de fábrica, ensamblar los soportes, aplicar el sellado contra la intemperie y asegurar los herrajes con la llave Allen incluida. Después de la instalación, recomendamos volver a verificar el apriete de los pernos después de los primeros 50 km de conducción para asegurarse de que todo permanezca seguro.
No, el portaequipajes está construido con aluminio de grado aeronáutico con un recubrimiento en polvo negro mate estable a los rayos UV, diseñado para soportar el sol intenso, la sal marina costera y las condiciones climáticas extremas sin decolorarse ni oxidarse. Las juntas de goma y el sellador de silicona también protegen los puntos de montaje de la entrada de agua.
El diseño universal de ranura en T es totalmente compatible con placas de rescate, toldos, tiendas de techo y portabicicletas. Este enfoque modular le permite personalizar su configuración según sus necesidades, ya sea que esté planeando una expedición todoterreno o un viaje de campamento de fin de semana.
Usa el selector de vehículo en la parte superior de esta página para confirmar la compatibilidad con tu año, marca y modelo específicos. Si tu vehículo no está listado o no estás seguro, contáctanos en support@evparts4x4.com con tu VIN — confirmaremos la compatibilidad en 24 horas. Nuestra política de Ajuste Garantizado significa que si hay un problema de compatibilidad de nuestra parte, lo solucionaremos.
Los pedidos se procesan y despachan en 2-4 días hábiles. Las piezas estándar se envían por correo aéreo y normalmente llegan en 10-15 días hábiles; las piezas de carrocería más grandes se envían por flete marítimo y tardan alrededor de 30-45 días hábiles. El envío es gratis en pedidos superiores a $100. Recibirás un número de seguimiento una vez que tu pedido sea enviado, y puedes rastrearlo en cualquier momento aquí. Detalles completos en nuestra Política de Envío.
Sí — ofrecemos una ventana de devolución de 30 días desde la fecha de entrega, y no cobramos ningún cargo de reposición. Si un artículo llega dañado o no es correcto por nuestra parte, organizaremos un reemplazo o reembolso completo y cubriremos el envío de devolución. Para los términos completos, consulta nuestra Política de Devolución y Reembolso o inicia una devolución a través de nuestra página de RMA.
No proporcionamos instalación directamente, pero la mayoría de nuestras piezas están diseñadas para una instalación DIY directa — la guía paso a paso está en la pestaña de Guía de Instalación arriba. Para piezas complejas (por ejemplo, frenos, suspensión, sistemas eléctricos), recomendamos que un mecánico calificado realice la instalación. Si tienes preguntas técnicas durante la instalación, nuestro equipo de soporte está feliz de ayudar en support@evparts4x4.com.
