
![How to Tie Down Your Motorcycle Without Damage [Pro Guide] - EVparts4x4](http://evparts4x4.com/cdn/shop/articles/how-to-tie-down-your-motorcycle-without-damage-pro-guide-5287232.webp?v=1769669486&width=360)
Imagina esto: vas conduciendo por la carretera y miras por el espejo retrovisor para ver cómo tu preciada motocicleta se mueve de un lado a otro. Es la peor pesadilla de todo motociclista.
Cuando no aseguras tu moto correctamente, suceden cosas malas. Pintura rayada. Manillar doblado. Incluso graves daños en la suspensión. Pero aquí está la buena noticia: no tiene por qué ser así.
Esta guía te muestra exactamente cómo dominar las correas de trinquete para tu motocicleta. No más suposiciones. Te enseñaremos las técnicas profesionales que garantizan un transporte seguro en todo momento.
Aprenderás cómo proteger tu inversión. Tu moto llegará a su destino en exactamente las mismas condiciones en las que estaba cuando saliste.
"¡Rayé mi moto!" - Prevención de daños estéticos
Muchos motociclistas se preocupan por rayar la pintura, el cromo o los carenados de su moto con los ganchos metálicos de las correas. Tenemos una solución sencilla: bucles suaves. Aquí te explicamos dónde y cómo usarlos para mantener tu moto impecable.
Una marca común y permanente
Un usuario del foro compartió esta historia: "Tenía prisa y enganché el gancho en S de la correa directamente a mi tija triple. Después de un viaje de 200 millas, la vibración había frotado el gancho a través del recubrimiento de polvo".
Esto sucede todo el tiempo. Los ganchos metálicos que rozan tu moto actúan como papel de lija. La vibración de la carretera lo empeora. El daño suele ser permanente.
Esta publicación detallada en el foro ADVrider muestra ejemplos reales de daños por correas. Es exactamente lo que quieres evitar.
La solución de bucle suave
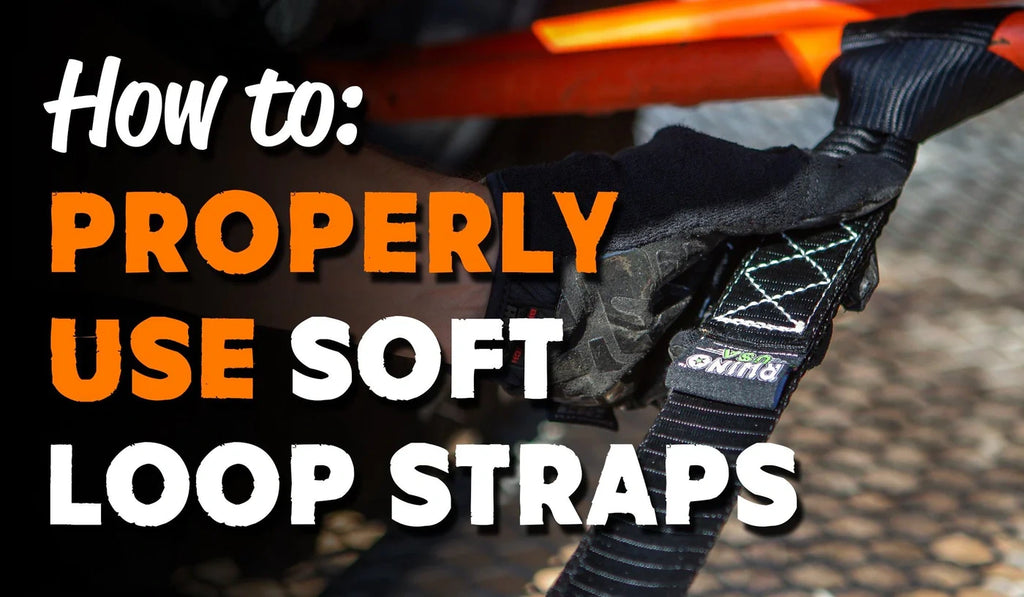
Los transportistas profesionales usan bucles suaves por una buena razón. Estos bucles de tela crean una barrera entre el gancho metálico y tu motocicleta.
Previenen el contacto directo. Ningún metal que toque tu moto significa que no hay arañazos.
El concepto es simple. El bucle suave distribuye la carga sobre una superficie más ancha y suave. Los ganchos metálicos crean puntos de presión concentrados que dañan los acabados. Los bucles suaves no.
Uso correcto de los bucles suaves
Debes elegir los puntos adecuados en tu moto. Elige piezas estructurales fuertes que puedan soportar la carga sin doblarse.
Para la parte delantera, usa las tijas inferiores, las barras de la horquilla por encima del guardabarros o secciones robustas del chasis.
Para la parte trasera, opta por el subchasis, los soportes sólidos del reposapiés del pasajero o los soportes del portaequipajes atornillados al chasis.
Algunas zonas están prohibidas.
Nunca uses el manillar. Es para dirigir, no para soportar cargas. Puede girar o doblarse bajo la presión de la correa.
Nunca pases el lazo por cables, mangueras o latiguillos de freno. Las correas apretadas pueden dañarlos y comprometer los controles de tu moto.
Nunca uses carenados de plástico o tubos de escape calientes. Los carenados se agrietan. El calor derrite las correas y provoca fallos peligrosos.
Así es como se sujetan correctamente.
Primero, enrolla el lazo suave alrededor del punto de anclaje elegido. Luego, pasa un extremo a través del otro para crear una conexión segura que no se deslice. Finalmente, conecta el gancho de tu correa de trinquete al extremo libre del lazo suave. Esto mantiene el metal alejado de las superficies pintadas.
La importancia de la seguridad
La Administración Federal de Seguridad de Autotransportes (FMCSA) reportó más de 15,000 violaciones por asegurar la carga de manera incorrecta en un año reciente.
Esto demuestra lo común que es el problema. Las cargas, incluidas las motocicletas, a menudo no se atan correctamente. Las malas elecciones de los puntos de anclaje suelen ser el origen de los problemas. Los bucles blandos resuelven este problema.
"¿Lo rompí?" - Cómo evitar daños en la suspensión
Apretar demasiado las correas puede dañar piezas caras como los retenes de la horquilla. Te mostraremos la forma correcta de tensar las correas. Asegurarás tu moto con confianza en lugar de miedo.

Aquí hay una historia de terror que sucede con demasiada frecuencia. Un motociclista aprieta su configuración de correas de trinquete hasta que la suspensión se comprime por completo.
¿El resultado? Retenes de horquilla dañados. El aceite de la horquilla se derrama por todas partes. Cae sobre los componentes de freno, lo cual es peligroso.
Tu objetivo no es hacer que la moto quede rígida. Quieres usar la suspensión para ayudar a mantener la tensión y absorber los baches de la carretera.
La física del transporte
La suspensión de tu moto absorbe los baches. Cuando la transportas, el remolque se mueve y tu moto necesita moverse con él.
Una suspensión completamente comprimida crea un sistema rígido y peligroso. Cada sacudida de la carretera se transfiere directamente a las correas y los puntos de anclaje.
Un gran bache puede crear un pico de tensión masivo. Esto puede romper las correas, los puntos de anclaje o dañar el chasis de tu moto.
El enfoque correcto usa la suspensión en lugar de luchar contra ella. La compresión parcial "precarga" el sistema.
La suspensión todavía puede comprimirse más para absorber los baches. Esto protege las correas de las cargas de impacto. Mientras tanto, la suspensión precargada empuja contra las correas, manteniéndolas tensas.
¿Qué tan apretado es demasiado apretado?

Aquí tienes el proceso paso a paso para una tensión perfecta en todo momento.
Primero, sujeta las cuatro correas a sus puntos de anclaje antes de apretar cualquiera de ellas significativamente.
Segundo, elimina la holgura. Usa el trinquete para apretar cada correa lo suficiente como para eliminar la holgura de la cincha. La moto debe quedar en posición vertical y sentirse estable, pero no comprimas mucho la suspensión todavía.
Tercero, aplica tensión uniforme. Trabaja en forma de "X". Añade unos cuantos clics de trinquete a la parte delantera izquierda, luego a la trasera derecha. Continúa con la parte delantera derecha, luego con la trasera izquierda. Repite este patrón.
Cuarto, observa la suspensión. Comprime la suspensión delantera y trasera aproximadamente un tercio a la mitad del recorrido total. Para la mayoría de las motos, esto es de 1 a 2 pulgadas. Deberías ver que la moto se asienta notablemente.
Quinto, haz la "prueba de empuje". Sujeta la moto por un punto sólido e intenta balancearla de lado a lado. La moto y el remolque deben moverse juntos como una sola unidad.
No debería haber ningún movimiento independiente. Las correas deben sentirse tensas como una cuerda de guitarra, pero no extremadamente apretadas.
Los expertos en logística de la guía de transporte de motocicletas de U-Ship afirman que este enfoque de presión equilibrada evita el estrés en el chasis y la suspensión de tu moto.
"¡Se soltó!" - El sistema de 4 puntos
Las correas sueltas permiten que tu moto se mueva durante el transporte. Te mostraremos una geometría de amarre profesional que garantiza la estabilidad en todo momento.
Por qué se sueltan las correas
Las correas que tiran solo hacia abajo o hacia los lados crean sistemas inestables.
Pequeños baches que comprimen y liberan la suspensión pueden crear momentos de holgura. Después de muchas millas, esto permite que los ganchos se suelten.
El secreto es crear fuerzas opuestas con los ángulos de tus correas. Necesitas correas que tiren hacia adelante y hacia abajo, contrarrestadas por correas que tiren hacia atrás y hacia abajo. Esta geometría bloquea todo en su lugar.
El método de amarre de 4 puntos
Este método utiliza cuatro correas de trinquete separadas. Es el estándar de oro para la seguridad y crea las fuerzas opuestas que necesitas.
1. Correa delantera #1 (lado derecho): Sujeta al punto de anclaje delantero del lado derecho con un lazo suave. Ancla al suelo del remolque, hacia adelante y a la derecha de la posición de la moto. Esto tira de la moto hacia adelante y a la derecha.
2. Correa delantera #2 (lado izquierdo): Repite el primer paso en el lado opuesto. Sujeta al punto de anclaje delantero del lado izquierdo. Ancla hacia adelante y a la izquierda. Esto tira de la moto hacia adelante y a la izquierda.
3. Correa trasera #1 (lado derecho): Sujeta al punto de anclaje trasero del lado derecho como el subchasis. Ancla hacia atrás y a la derecha de la posición de la moto. Esto tira de la moto hacia atrás y a la derecha.
4. Correa trasera #2 (lado izquierdo): Repite el paso anterior. Sujeta al punto de anclaje trasero del lado izquierdo. Ancla hacia atrás y a la izquierda. Esto tira de la moto hacia atrás y a la izquierda.
Este patrón en "X" de fuerzas opuestas evita el movimiento en cualquier dirección.
La comprobación final profesional
Después de conseguir la tensión correcta con el sistema de 4 puntos, haz una última revisión.
Primero, asegúrate de que la moto esté perfectamente vertical, sin inclinarse. Si se inclina, ajusta la tensión de la correa lateral hasta que esté erguida.
Luego, ata los extremos sueltos de las correas de forma segura. Las correas sueltas pueden engancharse en cosas. Peor aún, el movimiento constante puede aflojar lentamente los mecanismos de trinquete.
Aquí tienes un último consejo de experto: detente después de 10-15 minutos de conducción. Ari Henning, un respetado periodista y mecánico de motocicletas, dice que esta parada inicial es crucial. Como señala en el contenido de su perfil de autor de RevZilla, todo se asienta después de unos cuantos baches. Una comprobación rápida y quizás un clic de trinquete adicional marcan la diferencia.
"¡Esto es un rollo!" - Elegir las correas adecuadas
Las correas enredadas y difíciles son frustrantes. Te mostraremos soluciones que facilitan y hacen más eficiente todo el proceso de amarre.
Estás listo para un día de pista o un viaje por carretera. Pero primero, pasas 15 minutos desenredando correas sucias y anudadas.
Es una forma frustrante de empezar cualquier viaje. Muchos ciclistas se quejan de esto.
Las correas de trinquete tradicionales funcionan, pero pueden ser engorrosas. Alimentas manualmente una larga cinta a través del carrete. Aprietas cuidadosamente para eliminar la holgura. Luego atas la larga cola suelta.
Una solución de correa más inteligente
Los motociclistas que transportan motos con frecuencia pueden beneficiarse de la tecnología moderna de correas.
Imagina correas donde la cinta se retrae automáticamente, como una cinta métrica. Sin extremos sueltos que se enreden al guardar. Sin exceso de cinta que aletee durante el transporte.
Productos como la Correa de trinquete autorretráctil de 1 par de EVparts4x4 simplifican todo. Presionas un botón y el exceso de cinta se enrolla dentro del mecanismo. El montaje y desmontaje son mucho más rápidos, limpios y menos frustrantes. Es perfecto para cualquiera que esté cansado de los problemas de las correas tradicionales.
Elegir tus correas

Ya sea que elijas correas tradicionales o retráctiles, busca estas características clave.
Primero, verifica la capacidad de carga. El límite de carga de trabajo (WLL) de cada correa debe ser al menos la mitad del peso de tu motocicleta. Cuatro correas con 500 lb WLL cada una proporcionan una capacidad total de 2000 lb, suficiente para una moto de turismo de 700 lb.
Luego, examina el tipo de gancho. Busca ganchos en S recubiertos de goma o vinilo grueso. Esto proporciona protección adicional contra rasguños si un gancho entra en contacto accidentalmente con tu moto.
Finalmente, considera la calidad de la cincha. La cincha de poliéster de alta calidad es el estándar de la industria. Resiste el estiramiento cuando está mojada y soporta mejor el daño por rayos UV de la luz solar que el nailon más barato.
Transporta con confianza
Transportar tu motocicleta de forma segura es una habilidad. Ahora tienes el conocimiento profesional para hacerlo bien en todo momento.
Usa bucles suaves para proteger tu acabado. Aplica la tensión "Ricitos de Oro" para salvar tu suspensión. Emplea el sistema de amarre de 4 puntos para mayor estabilidad. Estos pasos eliminan los principales riesgos de daños.
Protegerás la apariencia de tu moto y preservarás su integridad mecánica. Tu motocicleta se mantendrá fijada en su lugar durante todo el viaje.
Carga, amarra con estos principios probados y conduce. Podrás tener total tranquilidad sabiendo que tu motocicleta está sana y salva detrás de ti.


