


![How to Tie Down Your Motorcycle Without Damage [Pro Guide] - EVparts4x4](http://evparts4x4.com/cdn/shop/articles/how-to-tie-down-your-motorcycle-without-damage-pro-guide-5287232.webp?v=1769669486&width=360)
Picture this: you’re driving down the highway and glance in your rearview mirror to see your prized motorcycle shifting around. It’s every rider’s worst nightmare.
When you don’t secure your bike properly, bad things happen. Scratched paint. Bent handlebars. Even serious suspension damage. But here’s the good news - it doesn’t have to be this way.
This guide shows you exactly how to master ratchet straps for your motorcycle. No more guessing. We’ll teach you the professional techniques that ensure secure hauling every single time.
You’ll learn how to protect your investment. Your bike will arrive at your destination in exactly the same condition it was in when you left.
“I Scratched My Bike!” - Preventing Cosmetic Damage
Many riders worry about scratching their bike’s paint, chrome, or fairings with metal strap hooks. We have a simple solution: soft loops. Here’s exactly where and how to use them to keep your bike looking perfect.
A Common, Permanent Mark
One forum user shared this story: “I was in a hurry and hooked the strap’s S-hook directly to my triple clamp. After a 200-mile trip, the vibration had rubbed the hook right through the powder coat.”
This happens all the time. Metal hooks rubbing against your bike act like sandpaper. Road vibration makes it worse. The damage is often permanent.
This detailed post on the ADVrider forum shows real examples of strap damage. It’s exactly what you want to avoid.
The Soft Loop Solution
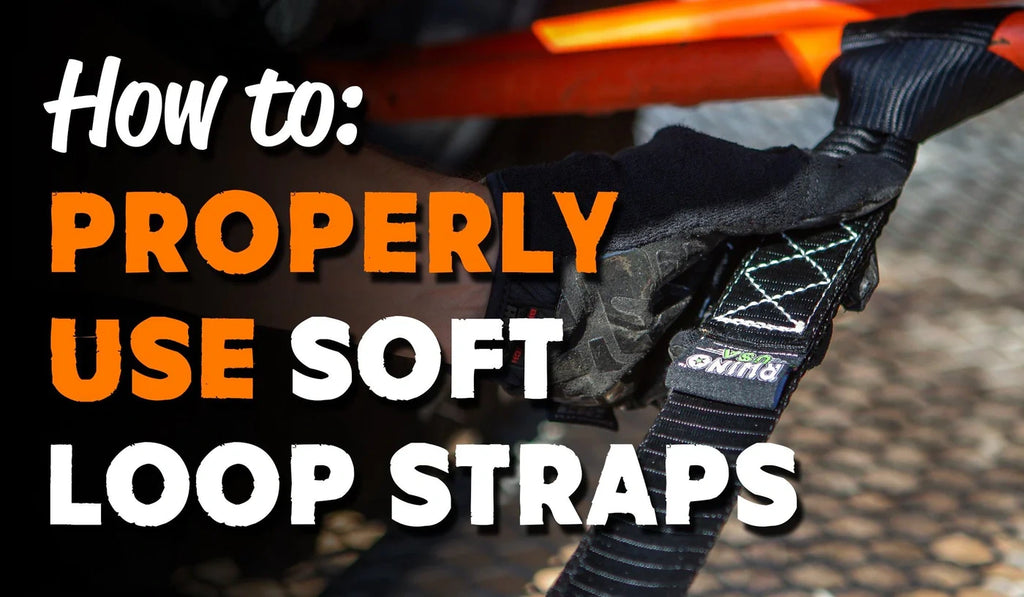
Professional haulers use soft loops for good reason. These fabric loops create a barrier between the metal hook and your motorcycle.
They prevent direct contact. No metal touching your bike means no scratches.
The concept is simple. The soft loop spreads the load over a wider, gentler surface. Metal hooks create focused pressure points that damage finishes. Soft loops don’t.
Using Soft Loops Correctly
You need to pick the right spots on your bike. Choose strong, structural parts that can handle the load without bending.
For the front, use the lower triple clamps, fork legs above the fender, or sturdy frame sections.
For the rear, go with the subframe, solid passenger peg brackets, or luggage rack mounts bolted to the frame.
Some areas are off-limits.
Never use handlebars. They’re for steering, not load-bearing. They can rotate or bend under strap pressure.
Never loop around wires, cables, or brake lines. Tight straps can damage these and compromise your bike’s controls.
Never use plastic fairings or hot exhaust pipes. Fairings crack. Heat melts strap webbing and causes dangerous failures.
Here’s how to attach them properly.
First, wrap the soft loop around your chosen anchor point. Next, pass one end through the other to create a secure connection that won’t slip. Finally, attach your ratchet strap hook to the free end of the soft loop. This keeps metal away from painted surfaces.
The Importance of Securement
The Federal Motor Carrier Safety Administration reported over 15,000 violations for improper cargo securement in a recent year.
This shows how common the problem is. Loads, including motorcycles, often aren’t tied down correctly. Poor anchor point choices are usually where things go wrong. Soft loops solve this problem.
“Did I Break It?” - Avoiding Suspension Damage
Over-tightening straps can damage expensive parts like fork seals. We’ll show you the right way to tension your straps. You’ll secure your bike with confidence instead of fear.
The Fork Seal Nightmare

Here’s a horror story that happens too often. A rider cranks down their ratchet straps motorcycle setup until the suspension bottoms out completely.
The result? Blown fork seals. Fork oil leaks everywhere. It gets on brake components, which is dangerous.
Your goal isn’t to make the bike rigid. You want to use the suspension to help maintain tension and absorb road bumps.
The Physics of Hauling
Your bike’s suspension absorbs bumps. When you haul it, the trailer moves, and your bike needs to move with it.
Fully compressed suspension creates a rigid, dangerous system. Every road jolt transfers directly to the straps and anchor points.
A big bump can create a massive tension spike. This can snap straps, break anchor points, or damage your bike’s frame.
The right approach uses suspension instead of fighting it. Partial compression “pre-loads” the system.
The suspension can still compress more to absorb bumps. This protects straps from shock loads. Meanwhile, the pre-loaded suspension pushes back against the straps, keeping them tight.
How Tight is Too Tight?

Here’s the step-by-step process for perfect tension every time.
First, attach all four straps to their anchor points before tightening any significantly.
Second, remove slack. Use the ratchet to tighten each strap just enough to remove loose webbing. The bike should stand upright and feel stable, but don’t compress the suspension much yet.
Third, apply even tension. Work in an “X” pattern. Add a few ratchet clicks to front-left, then rear-right. Follow with front-right, then rear-left. Repeat this pattern.
Fourth, watch the suspension. Compress front and rear suspension about one-third to one-half of total travel. For most bikes, that’s 1-2 inches. You should see the bike settle noticeably.
Fifth, do the “push test.” Grab the bike by a solid point and try to rock it side-to-side. The bike and trailer should move together as one unit.
There should be no independent movement. Straps should feel taut like a guitar string, but not extremely tight.
The logistics experts at U-Ship’s motorcycle transport guide say this balanced pressure approach prevents stress on your bike’s frame and suspension.
“It Came Loose!” - The 4-Point System
Loose straps let your bike shift during transport. We’ll show you professional tie-down geometry that guarantees stability every time.
Why Straps Come Loose
Straps that pull only straight down or straight sideways create unstable systems.
Small bumps that compress and release suspension can create moments of slack. Over many miles, this lets hooks come loose.
The secret is creating opposing forces with your strap angles. You need straps pulling forward and down, countered by straps pulling backward and down. This geometry locks everything in place.
The 4-Point Tie-Down Method
This method uses four separate ratchet straps. It’s the gold standard for safety and creates the opposing forces you need.
1. Front Strap #1 (Right Side): Attach to right-side front anchor point using a soft loop. Anchor to trailer floor, forward and right of the bike’s position. This pulls the bike forward and right.
2. Front Strap #2 (Left Side): Mirror the first step on the opposite side. Attach to left-side front anchor point. Anchor forward and left. This pulls the bike forward and left.
3. Rear Strap #1 (Right Side): Attach to right-side rear anchor point like the subframe. Anchor backward and right of the bike’s position. This pulls the bike backward and right.
4. Rear Strap #2 (Left Side): Mirror the previous step. Attach to left-side rear anchor point. Anchor backward and left. This pulls the bike backward and left.
This “X” pattern of opposing forces prevents movement in any direction.
The Professional Final Check
After getting the right tension with the 4-point system, do one final walk-around.
First, make sure the bike sits perfectly vertical, not leaning. If it leans, adjust the side strap tension until it’s upright.
Next, tie up loose strap ends securely. Flapping straps can catch on things. Worse, constant movement can slowly loosen ratchet mechanisms.
Here’s a final expert tip: stop after 10-15 minutes of driving. Ari Henning, a respected motorcycle journalist and mechanic, says this initial stop is crucial. As he notes in content for his RevZilla author profile, everything settles after a few bumps. A quick check and maybe an extra ratchet click makes all the difference.
“This is a Hassle!” - Choosing the Right Straps
Tangled, difficult straps are frustrating. We’ll show you solutions that make the entire tie-down process easier and more efficient.
The Frustration of Tangled Straps
You’re ready for a track day or road trip. But first, you spend 15 minutes untangling dirty, knotted straps.
It’s a frustrating way to start any journey. Many riders complain about this.
Traditional ratchet straps work but can be cumbersome. You manually feed long webbing through the spool. You carefully ratchet to remove slack. Then you tie up the long, loose tail.
A Smarter Strap Solution
Riders who transport bikes frequently can benefit from modern strap technology.
Imagine straps where the webbing retracts automatically, like a tape measure. No loose ends to tangle in storage. No excess webbing flapping during transport.
Products like the 1 Pair Auto-retractable Ratchet Strap from EVparts4x4 streamline everything. Push a button and excess webbing spools away inside the mechanism. Setup and takedown become much faster, cleaner, and less frustrating. It’s perfect for anyone tired of traditional strap problems.
Choosing Your Straps

Whether you pick traditional or retractable straps, look for these key features.
First, check load capacity. Each strap’s Working Load Limit (WLL) should be at least half your motorcycle’s weight. Four straps with 500lb WLL each provide 2000lb total capacity - plenty for a 700lb touring bike.
Next, examine hook type. Look for S-hooks coated in thick rubber or vinyl. This provides extra protection against scratches if a hook accidentally contacts your bike.
Finally, consider webbing quality. High-quality polyester webbing is the industry standard. It resists stretching when wet and handles UV damage from sunlight better than cheaper nylon.
Haul With Confidence
Secure hauling your motorcycle is a skill. Now you have the professional knowledge to do it right every time.
Use soft loops to protect your finish. Apply “Goldilocks” tension to save your suspension. Employ the 4-point tie-down system for stability. These steps eliminate the main damage risks.
You’ll protect your bike’s appearance and preserve its mechanical integrity. Your motorcycle stays locked in place for the entire journey.
Load up, tie down with these proven principles, and drive on. You can have complete peace of mind knowing your motorcycle is safe and sound behind you.


